Shipping Estimate
USA
- USA
- CAN
- USA
- CAN
Ships within 48 hours · Estimated delivery Jul 14 - Jul 19
 Promo Codes Available:
For Your Every Summer RSVP, with Code: SUMMER15
Description
false dracaena red sensation Shop 'Cordyline Red Sensation' Care and Growing GuideIntroducing the Cordyline 'red sensation', a vibrant member of the Cordyline australis! Hailing from New Zealand, this Cordyline's narrow sword like leaves bring an unmatched style and structure to any landscape, serving as nature's very own fashion statement. The Cordyline red sensation has several other common names such as Cabbage palm 'Red sensation', Cabbage tree 'red sensation', New Zealand Cabbage palm, and red grass palm. This evergreen
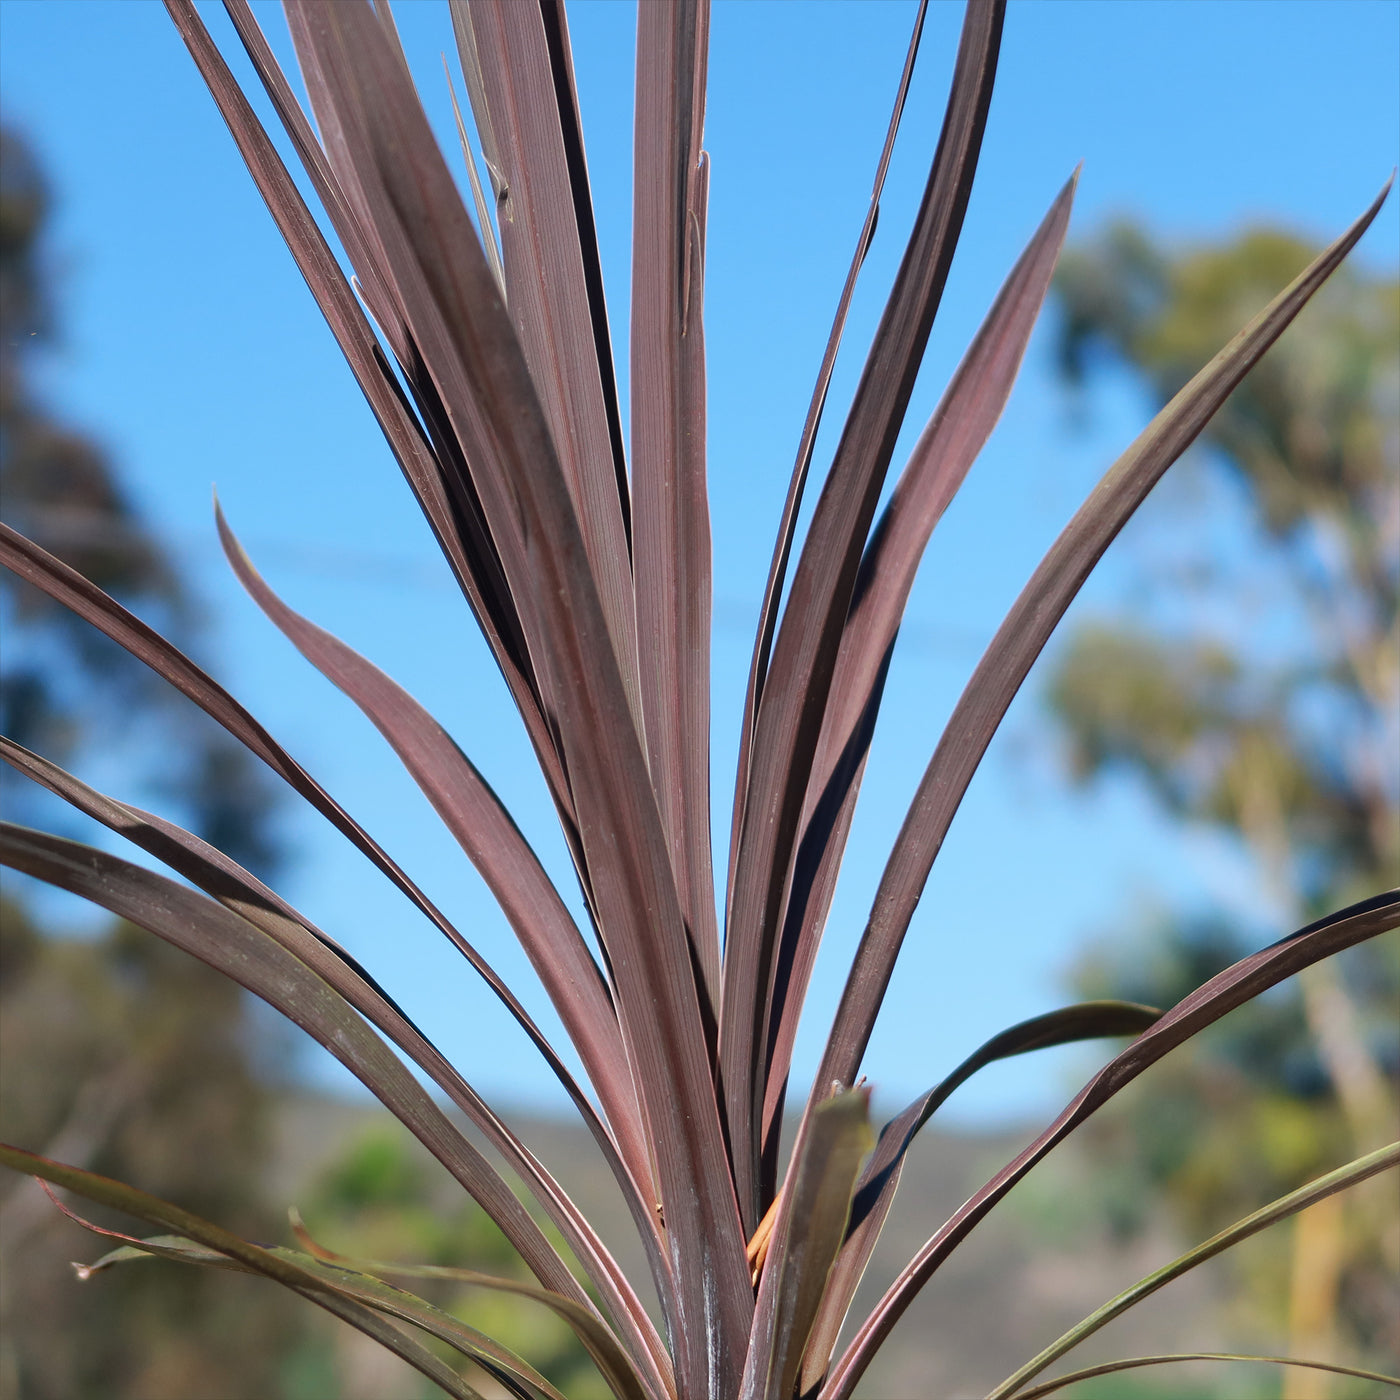
Introducing the Cordyline 'red sensation', a vibrant member of the Cordyline australis! Hailing from New Zealand, this Cordyline's narrow sword-like leaves bring an unmatched style and structure to any landscape, serving as nature's very own fashion statement.
The Cordyline red sensation has several other common names such as Cabbage palm 'Red sensation', Cabbage tree 'red sensation', New Zealand Cabbage palm, and red grass palm. This evergreen perennial palm-like tree is like the rockstar of the cordyline genus.
With its wider, spikier burgundy foliage that is distinct from the cordyline red star and remains vibrant and lush all year round.
Standing tall at 20 feet high and spreading outwards from 10 feet wide, this slow-growing evergreen tree knows how to make an entrance.
This cordyline red sensation plant is so versatile that you can grow it in containers on your patio or even bring it indoors for some serious potted plant glamour.
The flowers of the red sensation cordyline bloom during the late spring to summer, with the stunning white flowers with an enchanting fragrance that will have both you and the buzzing bees weak at the knees. With its deep burgundy-red color, this plant oozes richness without any fuss or hassle of dealing with delicate flowers.
Traditional medicine uses red cordyline plant leaves for wounds, headaches, and respiratory infections, with anti-inflammatory and antioxidant properties; consult a healthcare expert for proper dosage. It is a friendly succulent for both humans and pets.
Cordyline red sensation propagation can be easily done through stem cuttings. Simply cut a healthy stem at least 6 inches long, remove the lower leaves, and place it in a pot with well-draining soil to root. Keep the cutting in a warm, humid environment until roots develop.
Watering Needs
As with all succulents, resist the urge to constantly douse it with water like it's a thirsty marathon runner. Instead, give your Cordyline red sensation plant some slow and deep hydration only after the soil has completely dried out - think desert rainfall rather than monsoon season.
Pro Watering Tip
Remember, don't even think about watering from overhead unless you want your cordyline plant to feel like it's caught in an unexpected rainstorm (spoiler alert: that's not good).
When winter rolls around and your plant begins to go semi-dormant, hold off on watering altogether unless those leaves start rolling up like they're trying to do some yoga poses.
Then give them only a little sip of water so they can stay hydrated without getting too bloated and uncomfortable. You got this!
Light Requirements
When growing indoors, this vibrant red sensation cabbage tree prefers to bask in at least six hours of bright, indirect light near a south-or west- facing window. The key is to keep it compact and maintain those gorgeous burgundy leaves. But beware, too much sun can lead to burns, so make sure you gradually increase exposure or bring it indoors.
For outdoor cultivation, it prefers full sun to partial shade for 4-6 hours a day. If the cordyline plant is exposed to full sun for long periods of time, the leaves may become scorched and develop brown spots or patches. This can happen because the plant is not able to handle the intense heat and light of the full sun, and the leaves may dry out or become damaged. It is best to provide the plant with some shade during the hottest part of the day, especially in warmer climates, to prevent this from happening.
And if your cordyline red isn't getting enough light, it'll start stretching toward its source. So, let's give your red sensation cordyline what it deserves - just the right amount of light to bloom into the ultimate showstopper!
Optimal Soil & Fertilizer Needs
Use well-drained soil that is designed specifically for your Cordyline succulent. These specialty soil mixes have been precisely developed to imitate well-draining desert soils. We believe the best option is to use our specialty succulent potting mix that contains over 5 natural substrates and organic mycorrhizae to promote the development of a strong root system that helps your succulent to thrive.
If you don't mind getting a bit of dirt on your hands and are okay with a basic soil for your red sensation cordyline, then you can save some money and make your own mix by simply combing healthy natural garden soil with equal parts of sand or perlite.
When it comes to fertilizing your cordyline red sensation, remember that less is more. A small amount of natural fertilizer with an NPK equal ratio of 5-10-5 once a year in spring will do wonders for your plant's health and growth. Using a natural fertilizer ensures that other beneficial compounds and microbes are added to the soil, without the use of harsh chemicals. Show your Cordyline australis red sensation some love with awesome natural fertilizer and watch it thrive.
Hardiness Zones & More
When growing indoors, these cordyline red sensation plant thrive in warm temperatures ranging from 60 to 74 degrees Fahrenheit, but don't let them shiver below 50.
While household humidity is generally good enough, these adorable Cordyline australis red sensation will do even better with some extra moisture in the air. Set up a humidifier nearby or grow them in naturally humid rooms like your bathroom or kitchen.
For outdoor cultivation, the Cordyline red sensation plant is well-suited in USDA hardiness zone 9-11. It is important to protect the plant from frost and strong winds, as they can damage its vibrant foliage.
Final Thoughts
Overall, the Cordyline Red Sensation is a stunning variety of Cordyline Australis with vibrant red foliage that adds a pop of color to any garden. Its striking appearance makes it a real showstopper! When it comes to care, this plant prefers full sun and well-draining soil. It's also quite hardy and can tolerate a range of conditions. Just make sure to water it regularly and protect it from frost in colder climates. With a little love and attention, your Cordyline Red Sensation will thrive and bring beauty to your space!
Give this succulent Cordyline red sensation, a try if you're looking for an easy plant to care for!
Shipping Notes
- Free Standard Shipping on $100+ Orders to the USA.
- Except Preorder products are shipped in 48 hours.
- Delivery to the USA:
- Standard Shipping : 3-10 business days
- If time is of the essence, please consider selecting expedited delivery for faster service.
Exchange/Return Notes
- We offer a 30-day return/exchange service after receiving.
- Final sale items are not eligible for returns or exchanges.
- To process your return/exchange, please contact us at [email protected]
- Please click here for more details>>> Return & Exchange Policy