Pay in installments of $7.04 with
 ,
,
 and
and

Shipping Estimate
USA
- USA
- CAN
- USA
- CAN
Ships within 48 hours · Estimated delivery Aug 1 - Aug 6
 Promo Codes Available:
For Your Every Summer RSVP, with Code: SUMMER15
Description
types of bunny ear cactus Shop 'Bunny Ear Cactus - Opuntia microdasys' Care and InfoIntroducing the bunny ear cactus, also known as Opuntia microdasys. A stunning member of the Opuntia genus, this bunny ear cactus is adored for its adorable appearance and distinctive flattened pads that resemble bunny ears. It's a favorite among cactus enthusiasts and beginners alike. The bunny ear cactus is relatively easy to care for and can thrive both indoors and outdoors. Native to northern Mexico, the bunny ear cactus Opuntia microdasys has
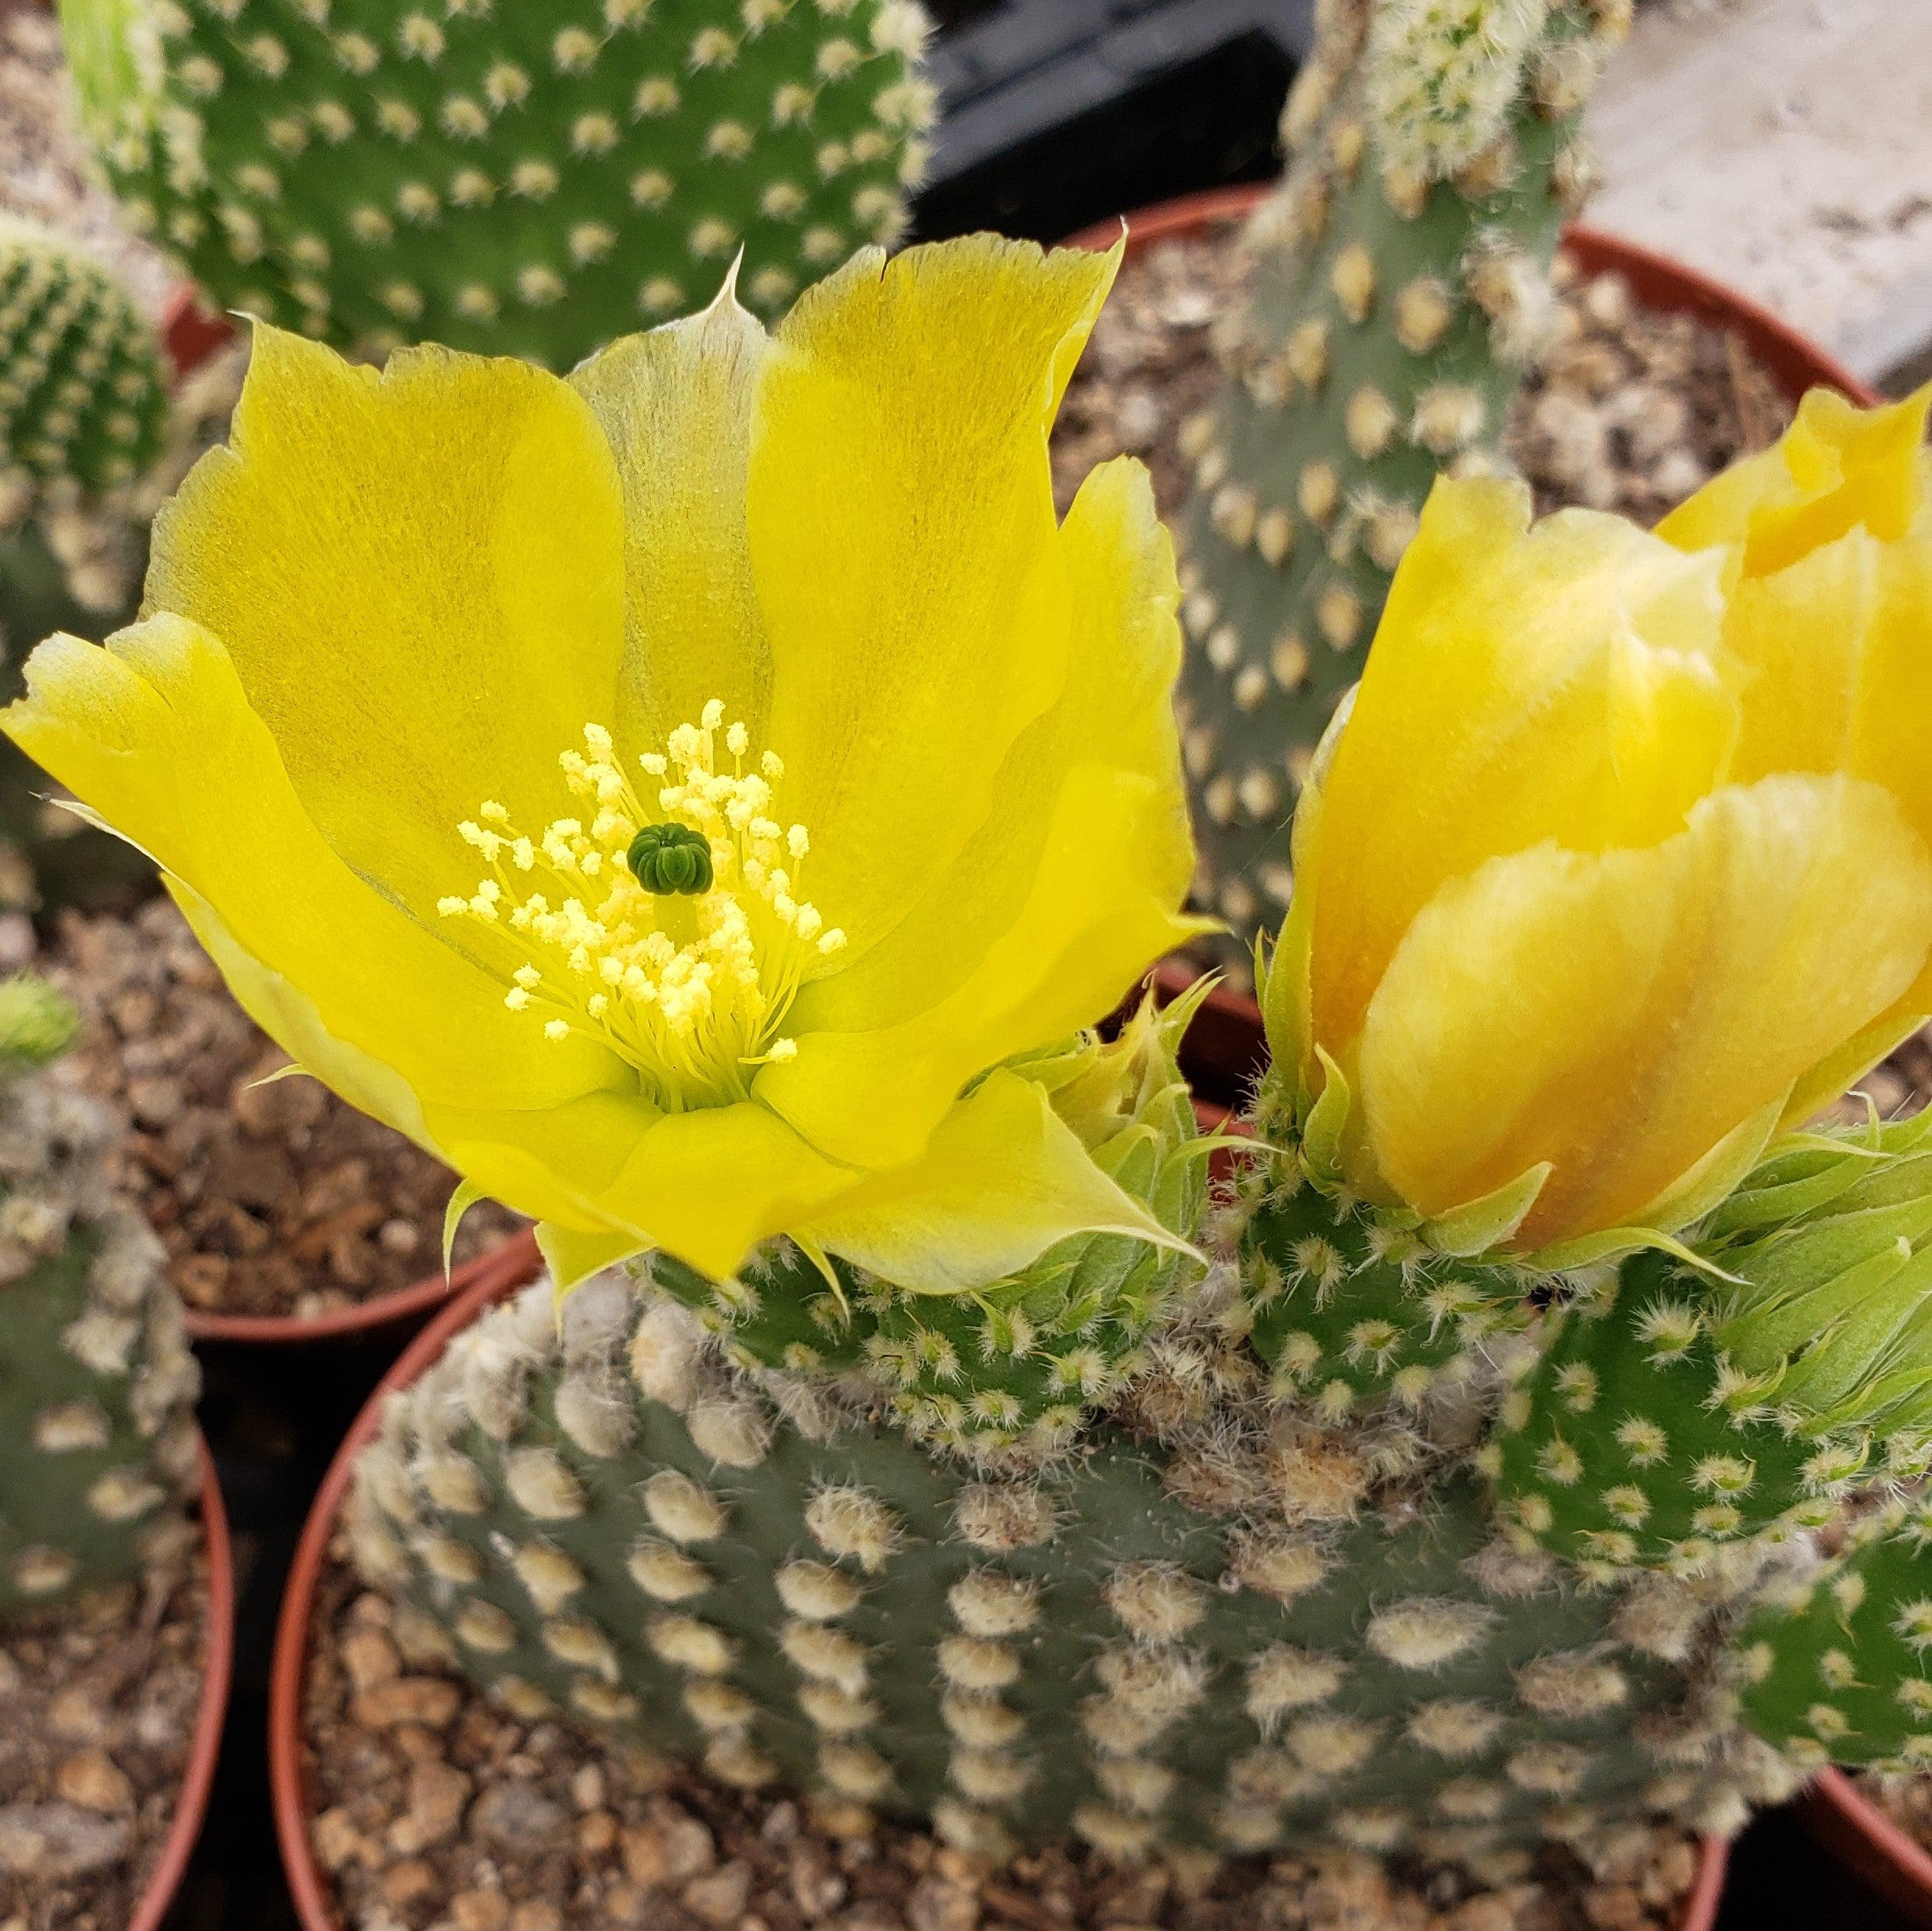
Introducing the bunny ear cactus, also known as Opuntia microdasys. A stunning member of the Opuntia genus, this bunny ear cactus is adored for its adorable appearance and distinctive flattened pads that resemble bunny ears. It's a favorite among cactus enthusiasts and beginners alike. The bunny ear cactus is relatively easy to care for and can thrive both indoors and outdoors.
Native to northern Mexico, the bunny ear cactus Opuntia microdasys has several other common names, such as angel's wings cactus, polka dot cactus, Cegador, and bunny cactus.
This bunny-ear cactus is characterized by its flattened, oval-shaped small pads that are covered in fuzzy, white, or golden spines called glochids. These spines are actually modified hairs that serve as a protective mechanism against predators. While they may look soft, they can easily detach and cause irritation, so it's important to handle your bunny ears with care. This Opuntia microdasys can grow up to 3 feet tall and 6 feet wide.
The bunny ear cactus flowers typically bloom in the spring or summer, and produce dense clusters of white or pure yellow flowers. The bunny ears cactus flowers have a unique shape and add a lovely touch to their overall appearance.
When it comes to bunny ear cactus propagation, it can be done through stem cuttings. This cactus is relatively easy to propagate, making it a popular choice for plant enthusiasts.
General Tips for Potting and Repotting Bunny Ear Cactus
- The bunny ears cactus should be repotted every two to three years.
- To ensure safety, use thick gardening or work gloves and tongs to protect yourself from sharp bristles.
- Gently remove the old soil around the roots and transfer the cactus to the new pot.
- Add fresh soil and firmly press it in place.
- You can also use tongs to avoid touching the cactus.
The fruits of the bunny ears, known as prickly pear fruit, are edible and are sweet, tangy fruit with antioxidants, vitamin C, and fiber, making them a healthy addition to your diet.
Additionally, the Bunny Ear Cactus is friendly to both humans and pets. It does not have any sharp spines or thorns that can cause harm, making it a safe choice for households with children or curious pets.
Watering Needs
As a desert dweller, the Bunny Ears Cactus is adapted to dry conditions and has low water requirements. Overwatering can be detrimental to its health and can lead to root rot. It's better to wait until the soil is entirely dry between waterings. This entails waiting until the soil is entirely dry before watering again. It's better to underwater than to overwater your bunny cactus.
In the spring and fall, during the active growing season, you can water your drought-tolerant cactus bunny ear about once every two to three weeks. However, it's important to adjust the watering frequency based on the specific conditions of your environment. Factors such as humidity, temperature, and the type of potting mix used can affect how quickly the soil dries out. Always check the soil's moisture content before watering.
During the winter months, your Opuntia microdasys bunny ears goes into a dormant period and requires even less water. You can reduce the watering frequency to once a month or even less, depending on the conditions. Remember, it's always better to be underwater than overwater. Observe the mature bunny ear plant closely and adjust your watering routine accordingly.
Light Requirements
If growing indoors, south-facing windows are usually a great choice for your bunny ear cactus, as they provide ample sunlight. If you don't have access to a sunny window, you can also use an artificial grow light to supplement the light requirements.
When grown outdoors, your bunny Ear Cacti love basking in the sun and thrive in full sun to partial shade. To keep your Opuntia microdasys happy, place it in a spot where it can receive at least 4-6 hours of bright, direct sunlight each day.
It's important to note that while Opuntia cacti love sunlight, they can be sensitive to intense afternoon, direct sunlight. Too much direct sunlight can cause sunburn and damage the bunny ear plant. If you notice any signs of sunburn, such as yellowing or browning of the skin or leaves, it's a good idea to move your bunny ears cactus to a slightly shadier location.
Remember to rotate your bunny cactus every few weeks to ensure even growth. This will prevent it from leaning towards the light source and becoming lopsided.
Optimal Soil & Fertilizer Needs
When it comes to choosing the right soil and fertilizers for your adorable bunny ear cacti, you need to be extra cautious and use the right kind of soil made for cacti in a pot with many drainage holes. Moisture can be a real killer, leading to root and stem rot in no time flat. But fear not, my fellow green thumbs! Planet Desert has got your back with our specialized cactus potting mix that includes 5 natural substrates with organic mycorrhizae – perfect for promoting healthy roots and happy bunny ear plants.
When it comes to fertilizing Opuntia microdasys bunny ears, less is more! These bunny cacti are not heavy feeders and can actually be harmed by excessive fertilization. It's best to use a balanced (5-10-5), water-soluble natural NPK fertilizer specifically formulated for cacti. Apply the fertilizer once a year during the active growing season, which is typically spring, and reduce or stop fertilizing during the winter months when the Opuntia microdasys bunny cactus is dormant.
Remember, it's always better to underwater and under-fertilize Bunny Ears Cactus than to overdo it. These plants are adapted to survive in nutrient-poor desert soils, so they don't require frequent or heavy fertilization.
Hardiness Zone & More
If your are growing your Opuntia microdasys indoors, it thrive in temperatures between 70-90°F during the day and prefer cooler temperatures around 60-70°F at night.
As for humidity, Bunny Ear Cacti prefer low humidity levels. They are adapted to arid environments and can suffer from fungal diseases if exposed to high humidity for extended periods. Aim for a humidity level below 50% to keep your Bunny Ear Cactus happy and healthy.
If you are living in USDA zones 9-11, you can grow your bunny ear cactus outdoors year-round. These zones have mild winters and warm to hot summers, which mimic the cactus's natural habitat.
The Bottom Line
Overall, the Bunny Ear cactus (Opuntia microdasys) is a delightful and low-maintenance plant to have in your collection. With its unique appearance, featuring flat, oval-shaped pads covered in fuzzy spines, it adds a touch of whimsy to any space. To care for your bunny ears cactus, provide it with bright, indirect sunlight and water it sparingly, allowing the soil to dry out between waterings. It prefers well-draining soil and can tolerate a range of temperatures; from warm indoor temperature to outdoor 9-11 USDA zones. With its charming and easygoing nature, the Bunny Ear cactus is sure to bring joy and beauty to your home or office.
Be sure to add Opuntia microdasys bunny ears cactus for sale to your home or garden and enjoy its low maintenance care, while admiring its impressive display year after year.
Frequently Asked Questions
-
Does bunny ear cactus need full sun?
Yes, the bunny ear cactus thrives in full sun. It requires at least six hours of direct sunlight daily to grow and maintain its attractive and vibrant appearance. Additionally, providing ample sunlight helps stimulate the cactus’ growth and promotes blooming during its flowering season.
-
How do you take care of a bunny ear cactus?
To keep your bunny ear cactus happy, make sure it gets plenty of sunlight but not too much direct sunlight. Water your bunny cactus sparingly, allowing the soil to dry out completely between waterings. Use well-drained soil and fertilize it during the growing season. Keep it in a warm environment and trim it if it gets too leggy. Bunny ear cacti are pretty low maintenance, so just follow these tips and enjoy your cute little bunny cactus.
-
Why is my bunny ear cactus dying?
There could be a few reasons why it's dying. It's possible that it's not getting enough sunlight or that you're overwatering it. Make sure to place it in a spot with bright sunlight for almost six hours a day and allow the soil to dry out completely between waterings. Also, check the roots for any signs of rot.
-
Is the fruit of the Bunny Ear Cactus edible?
Yes, bunny ear cactus fruit, also known as prickly pear fruit, is edible. They have a sweet and tangy flavor and are commonly used in various culinary dishes such as jams, jellies, and salads. Additionally, they are rich in antioxidants and nutrients like vitamin C and fiber, making them a healthy addition to your diet.
Shipping Notes
- Free Standard Shipping on $100+ Orders to the USA.
- Except Preorder products are shipped in 48 hours.
- Delivery to the USA:
- Standard Shipping : 3-10 business days
- If time is of the essence, please consider selecting expedited delivery for faster service.
Exchange/Return Notes
- We offer a 30-day return/exchange service after receiving.
- Final sale items are not eligible for returns or exchanges.
- To process your return/exchange, please contact us at [email protected]
- Please click here for more details>>> Return & Exchange Policy