chikara herbicide CHIKARA WG 50GR ERBICIDE – LVG
SKU: 82107850252
chikara herbicide

chikara herbicide CHIKARA WG 50GR ERBICIDE – LVG

Sale price$25.44 Regular price$28.27
Save 10%

Shipping Estimate
USA
  • USA
  • CAN

Ships within 48 hours · Estimated delivery Jul 7 - Jul 12

Promo Codes Available:

For Your Every Summer RSVP, with Code: SUMMER15

Description

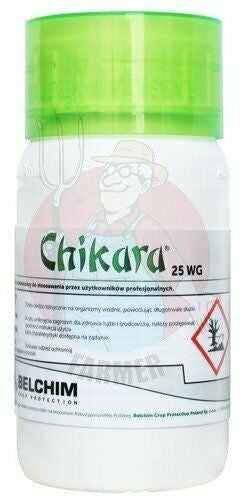
chikara herbicide CHIKARA WG 50GR ERBICIDE – LVGChikara est un herbicide action rsiduelle pour le contrle des mauvaises herbes long terme. Protection efficace et durable contre les mauvaises herbes Les mauvaises herbes peuvent rivaliser avec les cultures pour la lumire, leau et les nutriments, rduisant ainsi le rendement et la qualit des cultures. Chikara est un herbicide slectif base de flazasulfuron, qui permet un contrle long terme contre une large gamme de mauvaises herbes, tant gramines que

Chikara est un herbicide à action résiduelle pour le contrôle des mauvaises herbes à long terme.

Protection efficace et durable contre les mauvaises herbes
Les mauvaises herbes peuvent rivaliser avec les cultures pour la lumière, l’eau et les nutriments, réduisant ainsi le rendement et la qualité des cultures. Chikara est un herbicide sélectif à base de flazasulfuron, qui permet un contrôle à long terme contre une large gamme de mauvaises herbes, tant graminées que dicotylédones.

Pourquoi choisir Chikara ?

• Si vous souhaitez un herbicide à action résiduelle longue durée, qui empêche la repousse des mauvaises herbes pendant plusieurs mois…
• Si vous avez besoin d'un produit efficace sur une large gamme de mauvaises herbes, y compris les graminées et les dicotylédones…
• Si vous recherchez un herbicide compatible avec les cultures arboricoles et les zones non cultivées, facile à appliquer…

Chikara est la solution idéale pour le désherbage durable des cultures pérennes, des zones non cultivées et des terres agricoles, garantissant un désherbage efficace en une seule application.

Action résiduelle contre les graminées et les dicotylédones
Chikara contient du flazasulfuron, un principe actif qui agit à la fois par contact et de manière systémique, bloquant le développement des mauvaises herbes dès la germination. Grâce à son action résiduelle, il empêche la repousse des mauvaises herbes pendant des mois, réduisant ainsi le besoin de traitements répétés.

Comment ça marche?
Après application, Chikara est absorbé par les racines et les feuilles des mauvaises herbes. Le flazasulfuron inhibe une enzyme essentielle à la synthèse des acides aminés, stoppant ainsi la croissance des mauvaises herbes. Son action résiduelle maintient le sol exempt de mauvaises herbes pendant longtemps.

Pour obtenir les meilleurs résultats, voici quelques conseils :

Application en pré-levée ou post-levée : Utiliser Chikara avant ou immédiatement après la germination des mauvaises herbes pour empêcher leur croissance.
Dilution simple : Diluer le produit dans l'eau en suivant les instructions de l'étiquette (généralement 150-200 g par hectare) et appliquer uniformément sur le sol ou sur les mauvaises herbes.
Répéter le traitement si nécessaire : En cas d'infestations particulièrement difficiles ou de conditions favorables à la croissance des mauvaises herbes, une seconde application peut être nécessaire.

Nous sommes là pour vous aider!
Avez-vous des doutes sur l'application du Chikara ou sur la façon de gérer les mauvaises herbes sur votre terrain ? Notre équipe d’experts est disponible pour répondre à vos questions et vous proposer son accompagnement.

Composition et formulation
Chikara contient du flazasulfuron (25%), un principe actif qui garantit un contrôle efficace des mauvaises herbes. La formulation de poudre mouillable (WG) est facile à mélanger et à appliquer sur diverses surfaces.

Action combinée

Prévention et contrôle : Empêche la croissance des mauvaises herbes dès les premiers stades de germination, avec un effet également sur les plantes déjà levées.
Effet résiduel : Assure une protection longue durée pendant plusieurs mois, réduisant ainsi le besoin de traitements répétés.

Posologie et application

Dilution recommandée : Utiliser 150-200 g de Chikara par hectare, en application uniforme avec un pulvérisateur.
Répéter le traitement : Si nécessaire, répéter le traitement après quelques mois pour maintenir une protection continue.

Temps de sécurité
Chikara a un temps de sécurité variable en fonction de la culture traitée. Suivez attentivement les instructions pour garantir une sécurité maximale.

Règlements
Chikara est enregistré et conforme à la réglementation phytosanitaire européenne, garantissant une utilisation sûre et efficace dans la lutte contre les mauvaises herbes, dans le respect de l'environnement et de la santé humaine.


LICENCE PHYTOSANITAIRE OBLIGATOIRE

Shipping Notes
  • Free Standard Shipping on $100+ Orders to the USA.
  • Except Preorder products are shipped in 48 hours.
  • Delivery to the USA:
  1. Standard Shipping : 3-10 business days
  • If time is of the essence, please consider selecting expedited delivery for faster service.
Exchange/Return Notes
  • We offer a 30-day return/exchange service after receiving.
  • Final sale items are not eligible for returns or exchanges.
  • To process your return/exchange, please contact us at [email protected]
  • Please click here for more details>>> Return & Exchange Policy
SKU: 82107850252

Discover Niche Categories That Outsell chikara herbicide

Top-Converting Item to Boost Your Average Order

4.2 ★★★★★
Based on 705 reviews
Sort
Highest Rating
Newest First
Oldest First
Product Reviews
E
Verified Purchase
Eric J. Jenislawski
Lowell, US
★★★★★ 5
Great result, exceptional value, and easy, forgiving application.
Size: TRIM COAT KIT
I am thoroughly pleased with the results of this product, and the application was easier than I expected. Outstanding stuff. I am writing a longer review in case it helps people who are unsure about a "once and done" product that calls itself permanent. It's not hard to apply. It is forgiving and there's time to even it out. But here are some things to anticipate. My use case: I used Cerakote to restore the plastic trim on a used 2014 black Dodge Challenger that had been repainted but the plastic trim was original and it had been kept outside by the prior owner, so the contrast between the new paint and faded trim was noticeable. The trim was originally a deep, dark gray (it is never as black as the paint). It had faded to a medium-gray in many places: running boards on the side beneath the door, below the read bumper (which were also somewhat worn from debris), around the tail lights, and the plastic piece beneath the windshield wipers between the windshield and the hood. These were all looking weathered. The trim was very oxidized in some places, chalky grey near the hood and around the back bumper. The plastic around the tail lights also had light streaks in it from where water drains down from the trunk. What else I tried before I tried Cerakote: I got middling results from Mother's Back to Black. It looked somewhat better for a week or two, and then it went back to looking as before. Not impressed. I got a tip online to try rubbing the plastic trim with a melamine magic eraser, so I did that next, and this made a significant difference. Melamine is abrasive, so be careful if you do this on your trim. I went gently, up-and-down, side-to-side and in small circles, by hand, with gentle pressure like one would with a polishing compound. By removing the oxidation, the plastic was a few shades darker in the worst spots and the streaking on the rear tail light piece was gone. The rough spots on the trim at the bottom of the car and around the wheels looked somewhat better. But it certainly did not "like new." Cerakote experience: I decided to give Cerakote a try based on the video and good reviews. Bam! Back to factory-like deep dark gray. I wish I had taken pictures. It's incredible. Fully satisfied! I had already washed the trim with Dawn dish soap. I started with the trim bone dry. You are warned everywhere that water droplets will ruin the result, so don't expect to do this process right after you wash the car unless you like to live dangerously and have compressed air to spray cracks and crevices. I was worried that application would be streaky if I didn't do it right. Not so. It is forgiving. Here's what I learned. 1) The first 20% of what you'll get out of the packet goes on heavy with the lightest touch. One packet goes a long way. The next 60% is the "normal" application. This goes on the easiest. You can really milk the last drop out of each towelette, but I didn't because the last 20% of what you can get out of it by rubbing it really hard comes out very light and is not worth the uneven application unless you have some random area you don't care much about and want to use the remainder for that. I only used 5 packets to do the whole car. When you start a new packet, the beginning is where you might want to go back later and even it out once the application gets more normal. Or better, start a new packet on a big section to spread it around well and then move to smaller trim when the towelette is less fresh. 2) You've got time to work with it and make corrections. It stayed liquid like water for at least 20 minutes in my conditions: about 80 degrees, not very humid, indirect sunlight on an 80 degree car. Don't apply in direct sun or on a hot car. The product then gets sticky as it cures, but you can still work with it during the sticky time, rubbing it in and spreading it evenly with the towelette. I did not use a microfiber to "knock down" heavy spots. I just came back around with the towelette. I think a dry microfiber might pull off too much product. When it is half-cured, it is sticky and you can buff it with the towelette at this stage to further flatten and even things out. Work in sections, one piece of trim at a time. 3) Overlaps won't show as long as you rub it all in thoroughly. I tried the overlapping parallel passes method that they recommend, and this works pretty well. I was worried that I might get a "double heavy" streak where the passes overlap but this not so unless the towelette is fresh, but this is fixable. You can do a pretty natural, casual back-and-forth motion for the most part and it comes out fine. This is NOT a super-finicky product. I made a second or third back-and-forth pass in a few areas, and used circular motion in some places where the trim was textured or a little rough from wear, and it all looked even in the end. Just rub it down into the plastic and even out the sheen while it is uncured and it's good. 4) It cures like you see it when it's still wet. It doesn't lighten up very much as it cures. It just looks a little less wet. So get it right by eye when it is wet and that's pretty much what you will still have in an hour when it is cured. 5) Don't miss a spot! You'll see it for sure if you do because the different is so dramatic. And a "second coat" is not easy or recommended. This is the only once-and-done part that you want to get right, and you have plenty of cure time to be thorough. 6) Use the folded corner of the towelette to get into small corners and edges, like where the trim meets the paint or has an inside corner or some little nook. A fresh towelette is great for getting into small areas because a feather touch applies plenty of product when the towelette is fresh. The trim now looks amazing and I am entirely satisfied. I will use Cerakote on my other vehicles. The only minor con is a strong ammonia smell when you are up close to it while it is wet. No smell once it is cured. I would definitely wear the recommended gloves while applying. As others say, you will probably drop that towelette on the ground. It's slippery when wet. Keep it folded in quarters as it comes for ease of application. Turn to a new quarter once a side gets dirty or dry and fold it inside out for four more quarters to use. Bonus, but off-label -- at your own risk: The product is not intended for the soft rubber around the windows, but I tried it there too, and it looks amazing. All I did was wash the rubber with dish soap like the trim, and I rubbed it a few times with a wet microfiber cloth to get the superficial layer of oxidized rubber off. Then I applied Cerakote. It looks great. The rubber used to be blotchy and faded. The microfiber evened this out a little. I would not use melamine on the rubber -- this made it look worse in a test section. The Cerakote made it look great: jet black, much shiner, and much more even looking. Not quite "brand new" but far better than I thought possible. I thought I might need to replace the rubber. Now it's looking great next to the jet-black new paint. This afterthought use alone was worth the money. Can you apply a second coat the next day? They don't say you can, and I don't recommend it. This is meant to be one-shot, which is why you should check to make sure you don't miss any spots. I had two areas where I tried a second coat the next day. The first was on the plastic trim between the windshield and the hood. I didn't rub this trim much with melamine beforehand so there was a lighter area (light grey originally, the worst spot) that didn't get as black as the other sections so I did it again, which helped a little, but not much. I didn't wash this area with soap beforehand because I wasn't intending to fix it until I got going. Once you put things back to black you will start noticing other faded things more. Likewise, I did a second coat on the very top of the soft rubber at the bottom of the windows (the part which faces upward and thus gets the most sun), it wasn't as shiny as the other parts, so I went over that section gently again the next day with a fresh towelette. As soon as I did it, I thought it was a mistake. This didn't go well initially because the cured coating is very hydrophobic so the new, wet, Cerakote of the second coat goes on smooth initially and then "puddles up" into little droplets a few minutes later. It doesn't want to stick to the first coat. I thought I had messed it up, but I let it cure a little until the sticky phase, and spread it out again with the towelette. It stayed that time but gathered back a little into some streaks. I spread it once more a few minutes later and it looked good. It stayed even. It looks just fine a few days later, so I think it cured OK. I hope this product last for months as advertised. Even if it doesn't I would totally do it again because the results are superior, I still have half my towelettes left, and the product is not expensive. 10/10 would do again and will recommend to everyone.
WAS THIS REVIEW HELPFUL?YesReportShare
Reviewed in the United States on June 25, 2025
R
Verified Purchase
Robert Barger
Alexandria, US
★★★★★ 5
Easy to use, amazing results
Size: TRIM COAT KIT
This is an awesome product that is easy to use and has amazing results. My plastic trim never looked so good.
WAS THIS REVIEW HELPFUL?YesReportShare
Reviewed in the United States on May 14, 2026
N
Verified Purchase
NorthFloridaLT
Lake Worth, US
★★★★★ 5
Made My Bumper Look Brand New Again
Size: TRIM COAT KIT, Size: TRIM COAT KIT
I used this on the plastic trim and bumper on my truck, and I’m honestly impressed with how it turned out. The faded areas came back to a deep, rich black and really cleaned up the whole look of the rear end. I prepped everything the right way by washing it first with an all purpose cleaner, then wiping it down with 91% alcohol. I also taped off the surrounding paint and chrome just to be safe. After that, the application was simple and went on smooth without any streaks or blotchy spots. The difference was immediate. What used to look dull and worn now looks factory-fresh again. It also seems to bond well and not just sit on the surface like some cheaper products I’ve tried before. Overall, this was easy to use, gave great results, and made a noticeable improvement. I would definitely use it again on other trim pieces.
WAS THIS REVIEW HELPFUL?YesReportShare
Reviewed in the United States on April 12, 2026
E
Verified Purchase
E N.
Lowell, US
★★★★★ 4
Good product
Size: TRIM COAT KIT
Good coverage. I've had it on for about 10 days, and it's holding up better than any spray product I've used. Not perfect, but none of those streak lines you get with other products. It's been rained on twice so far.
WAS THIS REVIEW HELPFUL?YesReportShare
Reviewed in the United States on May 8, 2026
E
Verified Purchase
ernieupton
Houston, US
★★★★★ 5
good product and value
Size: TRIM COAT KIT
worked great on the 10yr old outback. Lasted several months..until we traded it in for a new outback.. will find something else to use it on...!
WAS THIS REVIEW HELPFUL?YesReportShare
Reviewed in the United States on May 20, 2026

recommand products