Shipping Estimate
USA
- USA
- CAN
- USA
- CAN
Ships within 48 hours · Estimated delivery Jul 7 - Jul 12
For Your Every Summer RSVP, with Code: SUMMER15
Description
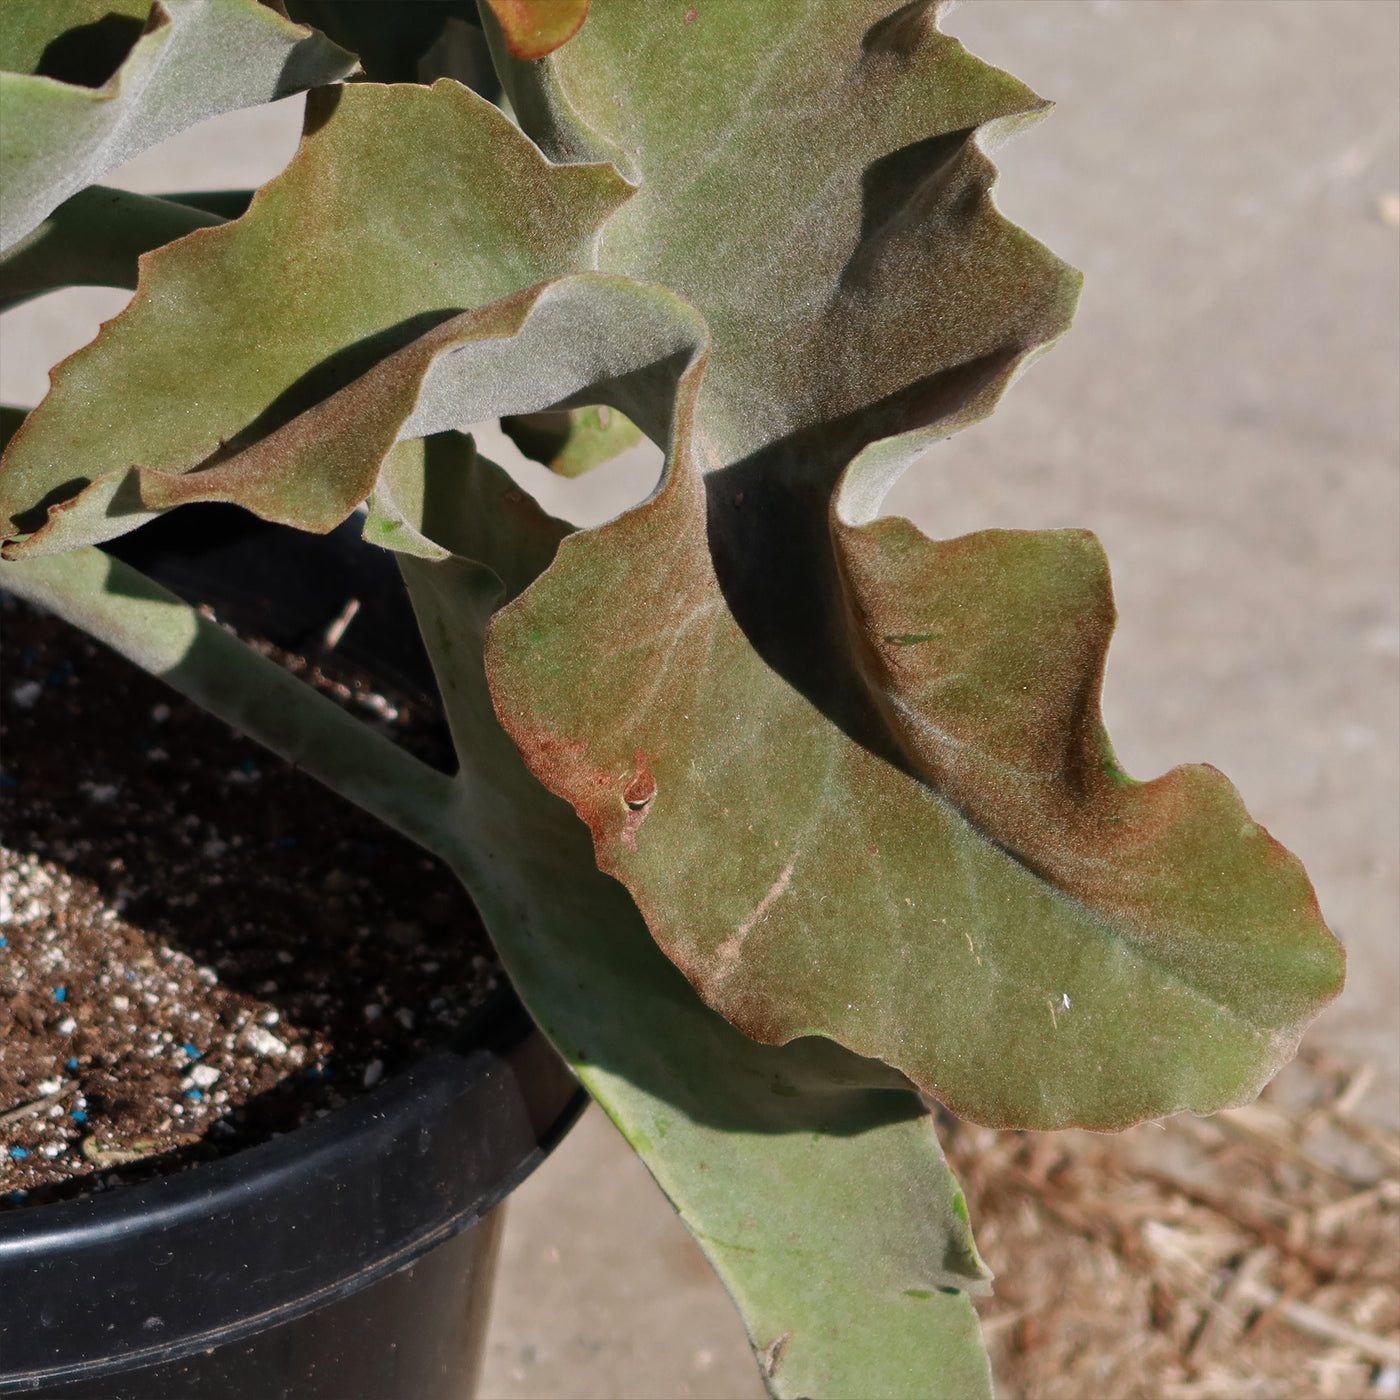
succulent elephant ear plant Kalanchoe beharensis – Elephant Ear Succulent Plant| Fast Delivery – Planet DesertAre you looking to add some color and life to your indoor space or garden? Look no further than the Kalanchoe beharensis, a vibrant member of the genus Kalanchoe! Hailing all the way from Madagascar, it has several other common names such as elephant ear kalanchoe, velvet leaf plant, and felt bush. The Kalanchoe beharensis is known for its unique appearance, with large, fleshy, velvety leaves that are covered in fine hairs, giving them a fuzzy
Are you looking to add some color and life to your indoor space or garden? Look no further than the Kalanchoe beharensis, a vibrant member of the genus Kalanchoe! Hailing all the way from Madagascar, it has several other common names such as elephant ear kalanchoe, velvet leaf plant, and felt bush.
The Kalanchoe beharensis is known for its unique appearance, with large, fleshy, velvety leaves that are covered in fine hairs, giving them a fuzzy texture. The silvery-green leaves have a slightly scalloped or serrated edge, which adds to their visual appeal.
This felt bush plant can grow up to 6 feet tall in its natural environment, but it can also be pruned to keep a more compact size if preferred. It can grow both indoors and outdoors, including its most amazing variety, the Kalanchoe beharensis fang (Felt plant). The stems of the Kalanchoe beharensis are thick and woody, providing stability and structure to this succulent plant.
The flowers of the Kalanchoe beharensis elephant ear plant are small and inconspicuous compared to its stunning leaves. They typically appear in clusters at the top of tall succulent stems. The greenish-yellow flowers add a subtle touch to the plant's overall appearance. While the flowers may not be the main attraction, they still contribute to the beauty of this unique succulent.
To propagate the Kalanchoe beharensis elephant's ears kalanchoe, you can use stem cuttings or leaf cuttings. With time and proper care, the cutting will develop roots and grow into a new plant. It's an exciting way to expand your collection of these beautiful Kalanchoe varieties!
Watering Needs
Native to arid regions of Madagascar, the Kalanchoe beharensis has moderate watering needs. It's important to strike a balance when watering this elephant ear plant to keep it happy and healthy.
When it comes to watering, the Kalanchoe beharensis prefers a "soak and dry" approach. This means that you should thoroughly water your elephant ear Kalanchoe until the excess water just drains out of the bottom of the pot, allowing the soil to become moist. However, it's crucial to let the soil dry out between waterings to prevent overwatering, which can lead to root rot.
During the growing season, which is typically spring and summer, you can water it more frequently, about once every 1-2 weeks. But during the dormant period in winter, when this Kalanchoe plant is not actively growing, you should reduce watering to once every 3-4 weeks.
Remember, it's always better to be underwater than overwater your Kalanchoe beharensis. So, keep an eye on the soil moisture and adjust your watering schedule accordingly. And don't forget to provide good drainage by using a well-drained potting mix and a pot with drainage holes.
Light Requirements
The Kalanchoe beharensis loves bright light. This elephant-ear succulent thrives in a spot that receives plenty of full sun to partial sun throughout the day. Placing it near a south or west-facing window is ideal, as it will get the right amount of indirect light without being exposed to direct sunlight, which can scorch its leaves.
If you don't have a window with adequate sunlight, you can also use artificial grow lights to supplement the natural light. Just make sure to keep the Kalanchoe plants at least a foot away from the light source to prevent leaf burn.
While the Kalanchoe beharensis can tolerate some shade, it won't thrive in low-light conditions. Lack of light can cause the elephant ear kalanchoe to become leggy and lose its vibrant color. So, be sure to give it the bright light it craves, and it will reward you with its stunning foliage!
Remember, finding the right balance of light and water will keep your Kalanchoe beharensis elephant's ear Kalanchoe happy and healthy.
Optimal Soil & Fertilizer Needs
The Kalanchoe beharensis favors very airy soil, moist, sandy soil that drains well. Planting them in ordinary soil will result in compacted roots, stunted growth, and, most likely, root rot. Instead, make or buy a well-draining potting soil, or ideally, use our specialized succulent potting mix that contains 5 natural substrates and mycorrhizae to promote the development of a strong root system that helps your elephant ear kalanchoe plants to thrive.
As for fertilizing, the Kalanchoe beharensis doesn't require heavy feeding. During the growing season, you can fertilize your elephant ear succulent with a balanced, water-soluble fertilizer. Apply the fertilizer once a year to provide the Kalanchoe plant with the necessary nutrients. However, during the dormant period in winter, it's best to avoid fertilizing the plant altogether.
Remember to avoid over-fertilizing, as it can lead to fertilizer burn and damage to new growth on the succulent plants.
Hardiness Zone & More
The Kalanchoe beharensis is generally suited for USDA hardiness zones 10-11. It prefers warm temperatures and doesn't tolerate frost well, so it's best to keep it indoors or in a protected area if you live in a colder climate.
According to the Royal Horticultural Society, this elephant ear plant thrives in average to warm temperatures between 65-85°F. It can tolerate slightly cooler temperatures, but it's important to avoid exposing it to temperatures below 50°F as it can cause damage to the leaves and overall health of the plant.
As for humidity, the Kalanchoe beharensis is adaptable and can handle a range of humidity levels. It can tolerate both dry and slightly humid conditions. However, it's important to avoid excessive humidity or stagnant air, as it can lead to fungal issues or root rot. Providing good airflow around the plant is beneficial for its overall health.
Don't miss out on this opportunity to add something truly exceptional to your succulent garden. Order your very own Kalanchoe beharensis - elephant ear kalanchoe today!
Shipping Notes
- Free Standard Shipping on $100+ Orders to the USA.
- Except Preorder products are shipped in 48 hours.
- Delivery to the USA:
- Standard Shipping : 3-10 business days
- If time is of the essence, please consider selecting expedited delivery for faster service.
Exchange/Return Notes
- We offer a 30-day return/exchange service after receiving.
- Final sale items are not eligible for returns or exchanges.
- To process your return/exchange, please contact us at [email protected]
- Please click here for more details>>> Return & Exchange Policy