Shipping Estimate
USA
- USA
- CAN
- USA
- CAN
Ships within 48 hours · Estimated delivery Jul 12 - Jul 17
 Promo Codes Available:
For Your Every Summer RSVP, with Code: SUMMER15
Description
areca palm fronds Shop 'Areca Palm – Dypsis lutescens' Care & Growing GuideKey Highlights Areca Palm Tree Areca Palm grows in dense clumps, with multiple smooth, golden yellow stems emerging from the base and narrow fronds like bamboo leaves, creating a full and bushy appearance. Recognized by NASA, this palm removes toxins like formaldehyde and benzene, improving indoor air quality. One of the most widely grown indoor palms, it thrives in homes and offices, adding a tropical touch with its graceful, feathery fronds. Areca
Key Highlights – Areca Palm Tree
- Areca Palm grows in dense clumps, with multiple smooth, golden-yellow stems emerging from the base and narrow fronds like bamboo leaves, creating a full and bushy appearance.
- Recognized by NASA, this palm removes toxins like formaldehyde and benzene, improving indoor air quality.
- One of the most widely grown indoor palms, it thrives in homes and offices, adding a tropical touch with its graceful, feathery fronds.
- Areca Palm can withstand short dry periods, making it relatively low-maintenance.
- This palm adapts well to bright, indirect light, requires minimal pruning, and is non-toxic to pets, making it an excellent choice for beginners.
The Areca Palm, known as Dypsis lutescens, is one of the most beloved indoor clumping palms, known for its graceful, feathery fronds and ability to enhance indoor spaces with a tropical feel. The plant is also known for its ability to improve air quality by filtering out toxins such as formaldehyde and benzene. Unlike some palms that require extensive care, Areca Palm is relatively simple to grow and responds well to consistent watering and humidity, making it an excellent choice for beginners.
Native to Madagascar, this palm has gained worldwide popularity as both a houseplant and an outdoor landscape feature in warm climates. Its attractive appearance, air-purifying properties, and low-maintenance nature make it a favorite choice for homes, offices, and commercial spaces. It is also known as a butterfly palm, golden cane palm, and yellow palm.
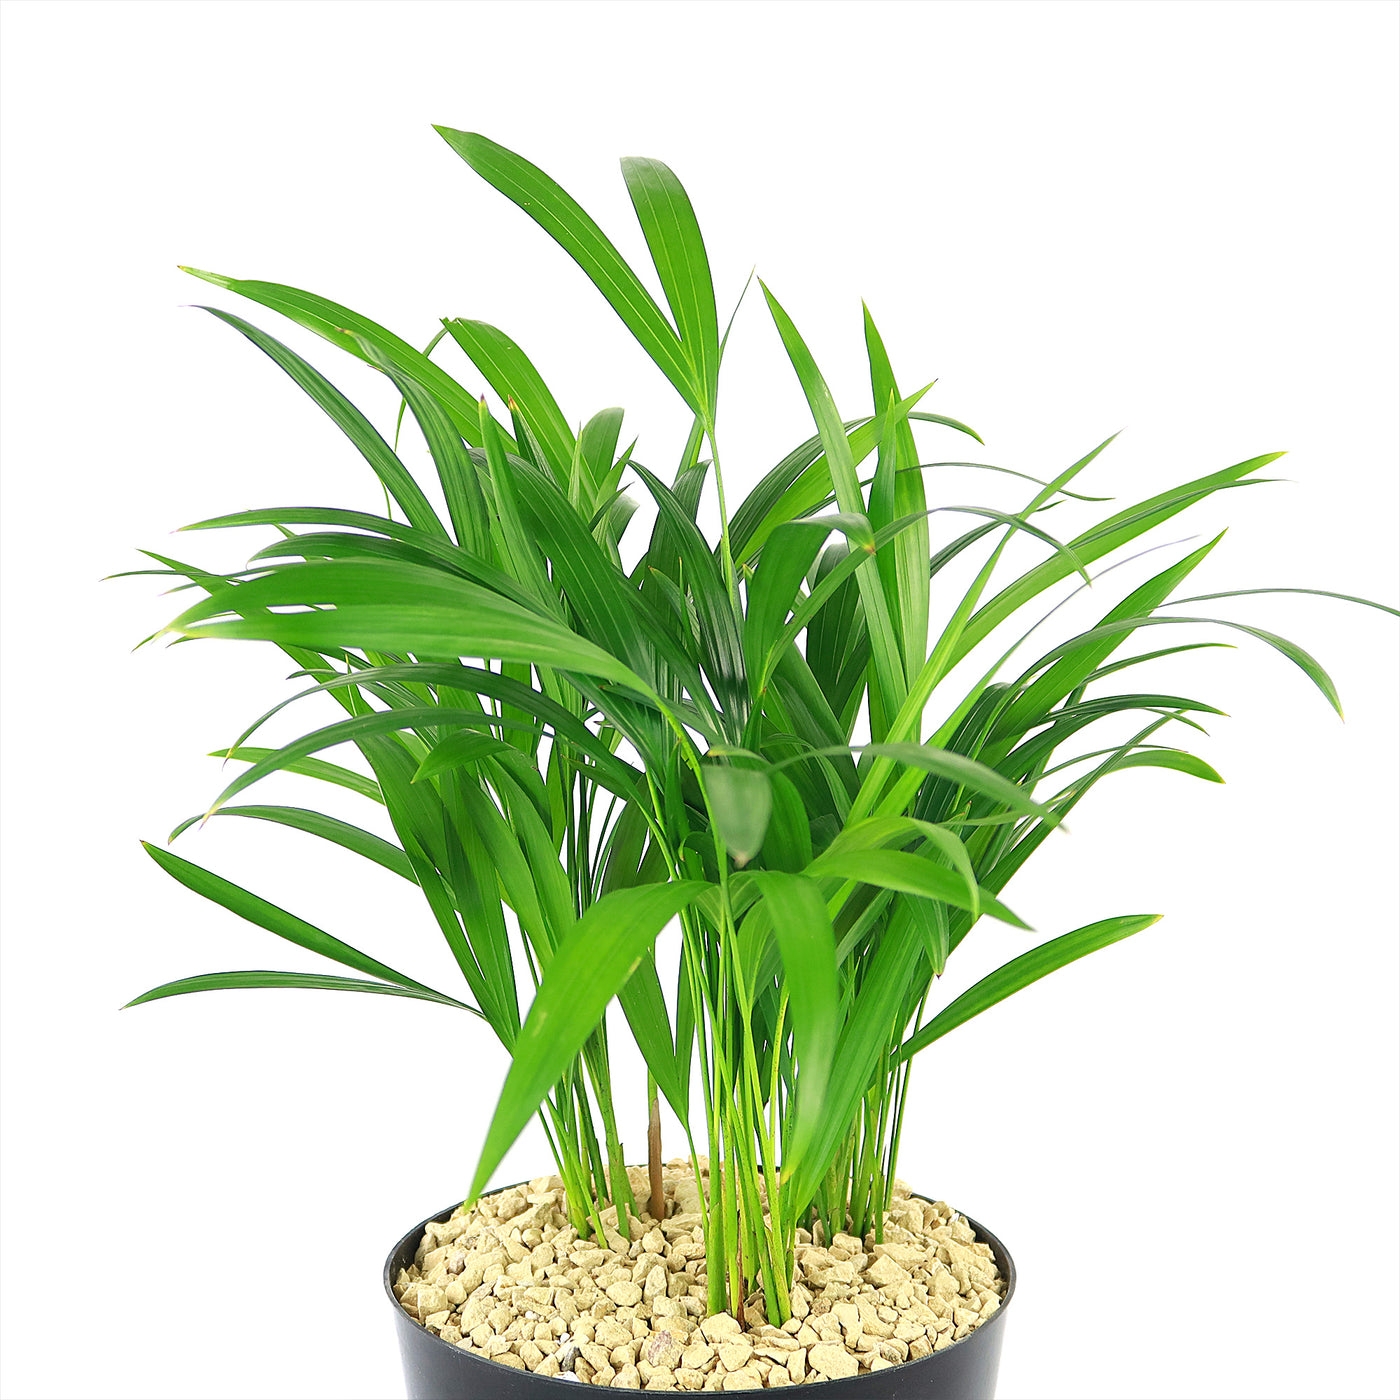
Areca Palm is a clustering palm, meaning multiple stems emerge from the base, creating a full and bushy appearance.
The leaves are long, arching, and pinnate, with a lush green color that adds vibrancy to any setting.
When grown indoors, the plant remains relatively compact, while outdoor specimens can develop into tall, striking features in tropical gardens.
When growing indoors, your Areca Palm typically grows up to 7 feet tall in height, making it an excellent floor plant for homes and offices.
When grown outdoors, this Areca palm tree can reach an impressive height of 30 feet, with a spread of about 12 feet wide.
Indoor Areca Palms rarely bloom, but outdoor plants may produce small, yellowish-white flowers from late spring to summer. These flowers grow in clusters along the base of the fronds and are followed by small, oval-shaped fruits that transition from green to yellow and eventually turn black when fully mature. The fruits contain seeds but are not typically used for propagation, as division or offsets are preferred methods for growing new plants.
Recognized by NASA’s Clean Air Study, Areca Palm helps remove toxins like xylene, toluene, and carbon dioxide, improving indoor air quality. This palm releases moisture into the air, making it ideal for homes with dry air, especially during winter.
When and How to Water Your Areca Palm
The Areca palm is drought-tolerant once established, making it an excellent choice for those looking for a low-maintenance tropical plant. While it prefers consistent moisture, it can survive short dry spells without severe damage. Overwatering is a more significant risk than underwatering, as excessive moisture can lead to root rot. Ensure the soil dries slightly between waterings to maintain the right balance.
In the spring and summer, during its active growing season, the Areca palm tree requires more frequent watering. In warm temperatures, watering once every 5–7 days is ideal, depending on humidity levels. If it is grown outdoors, rainfall can supplement its needs, but manual watering should be adjusted accordingly. Always check the top 1–2 inches of soil before watering to prevent oversaturation.
In fall and winter, when growth slows down, the watering frequency should be reduced. Watering once every 10–14 days is sufficient to prevent dehydration while avoiding waterlogging. Indoor plants may require slightly more frequent watering if exposed to dry air from heating systems, so monitoring humidity levels is essential.
Light Requirements – Where to Place Your Areca Palm Tree
For indoor growth as a houseplant, your Areca palms thrive in bright, indirect light for at least 4-6 hours a day.
A location near an east- or south-facing window with filtered sunlight is ideal. It can tolerate lower light conditions, but growth may slow down, and the leaves may become less vibrant.
To promote healthy foliage, rotating the plant occasionally ensures even exposure to light.
Artificial grow lights can also supplement light if natural brightness is insufficient.
For outdoor cultivation, the Areca palm tree prefers partial to full sun, requiring 4–6 hours of bright, indirect light daily.
Morning sunlight is ideal, while intense afternoon rays may scorch the fronds, especially in hotter climates. If grown in a container, moving it to a shaded area during peak summer months can prevent leaf damage.
Optimal Soil & Fertilizer Needs
Areca palms grow best in well-draining, slightly acidic to neutral soil with good aeration. A high-quality potting mix with peat, sand, and perlite ensures proper drainage. Planet Desert has specialized potting soil that includes an organic substrate with mycorrhizae to help with the growth of a healthy root system to help your succulents thrive.
A balanced liquid NPK fertilizer at a 5-10-5 ratio applied once a year in the spring during the growing season promotes lush foliage and robust growth. Slow-release palm fertilizers with essential micronutrients like magnesium and iron also help prevent yellowing leaves. During the dormant season, fertilization should be stopped to avoid unnecessary growth that may weaken the plant in cooler months.
Hardiness Zones & More
When growing indoors as a houseplant, the Areca palm plant thrives in temperatures between 65–75°F with humidity levels above 40%. Dry air can cause leaf browning, so misting or using a humidity tray can maintain optimal moisture levels. Avoid placing the plant near cold drafts or heating vents, as sudden temperature fluctuations can cause stress.
For outdoor cultivation, Areca palm is hardy in USDA zones 10–11, thriving in warm, humid conditions.
It can tolerate brief temperature drops but should be protected from frost.
The ideal outdoor humidity level is 50% or higher, making it best suited for tropical or subtropical environments.
For those in cooler climates, container-growing allows for seasonal relocation indoors.
Wildlife – Areca Palm Flowers Attract the Following Friendly Pollinators
The Areca palm produces small, yellowish-white flowers that attract a variety of pollinators such as bees, hummingbirds, butterflies, and other beneficial pollinators. While not a primary pollinator plant, its presence in a tropical garden can support local insect populations.
According to the ASPCA, the Areca palm is non-toxic to humans, cats, dogs, and birds, making it a safe choice for pet owners. Unlike some palms that pose toxicity risks, Areca palm does not contain harmful compounds that could endanger household animals.
How to Propagate Areca Palm
Areca palms can be easily propagated through division or by planting seeds. To propagate through division, carefully separate the offshoots from the main plant and replant them in well-draining soil. Root division is best done in spring or early summer when growth is most active. If propagating from seeds, soak them in warm water for 24 hours before planting them in a mixture of peat moss and perlite. Keep the soil consistently moist and provide bright, indirect light for optimal growth.
The Bottom Line
Overall, the Areca Palm (Dypsis lutescens) is a stunning, easy-to-care-for plant that thrives both indoors and outdoors. It is a clustering palm tree with multiple stems, produces a full, bushy appearance with long, arching, pinnate leaves in lush green, adding vibrancy to any setting. Its elegant fronds, air-purifying benefits, and adaptability make it a favorite among plant enthusiasts. Whether placed in a bright living room corner, an office, or a tropical garden, this palm adds beauty and a refreshing touch of greenery. With its elegant feathery fronds, ability to purify air, and pet-friendly nature, it’s a popular choice among plant enthusiasts. Proper care, including adequate watering, indirect sunlight, and occasional fertilization, ensures vibrant growth and longevity. Order your very own Areca Palm for sale today!
Shipping Notes
- Free Standard Shipping on $100+ Orders to the USA.
- Except Preorder products are shipped in 48 hours.
- Delivery to the USA:
- Standard Shipping : 3-10 business days
- If time is of the essence, please consider selecting expedited delivery for faster service.
Exchange/Return Notes
- We offer a 30-day return/exchange service after receiving.
- Final sale items are not eligible for returns or exchanges.
- To process your return/exchange, please contact us at [email protected]
- Please click here for more details>>> Return & Exchange Policy